Ciao a tutti rieccomi di nuovo con voi, oggi vi parlerò dell’ allestimento interno del Vecio.
Il tutto è iniziato ancora prima dell’ arrivo del Vecio, in quanto grazie l’ aiuto del mio portatile ho realizzato quello che sarebbe diventato l’allestimento interno.
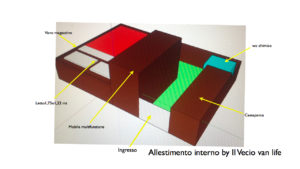
Siccome mi piace molto il fai da te ho voluto realizzare un allestimento provvisorio con materiale di scarto e recupero , visto anche la bella stagione non vedevo l ora di iniziare a girare con il Vecio, poi facendo così, avrò anche modo di apportare delle modifiche in base alle mie esigenze il prossimo autunno, sapete disegnare su un computer con tutte le misure può essere divertente e preciso ma poi bisogna vedere se in realtà va come volevamo veramente , quindi mi è sembrata la cosa più sensata fare così per creare qualcosa di veramente mio.
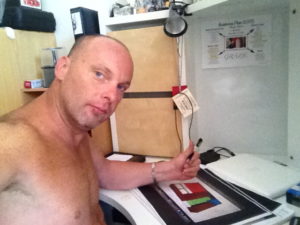
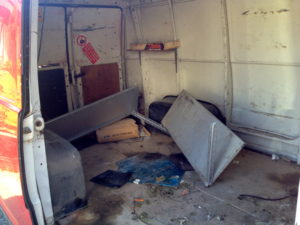
Quindi arrivato il Vecio ho iniziato con togliere le immondizie e fatto pulire tutto grazie l’aiuto di un’ idropulitrice tutto quanto, fuori per fuori,fortuna che siamo in estate così si è asciugato in un paio di ore, ho dovuto fare questa operazione in quanto il Vecio apparteneva ad un giardiniere, quindi potete capire e immaginare in che condizioni si trovava.
Bene ora iniziamo con l’ allestimento vero è proprio : per prima cosa ho iniziato con buttare giù un tappeto di gomma con disegnato sopra un pavimento in legno, recuperato da un amico che stava ristrutturando il suo appartamento,un bel risparmio, dopo questa operazione ho recuperato due ripiani di legno abbandonati in garage da qualche anno della misura di 1,22 x 0,80 mt l’uno , dopo averli verniciati, ho creato la base di quello che sarà letto, posizionandoli nella parte posteriore del Vecio nel senso della larghezza, sfruttando altri due pezzi di legno li ho usati come piedi assieme ad parte del telaio per tenere sollevato il tutto di 45 cm circa, creando così anche un gavone inferiore per poter metter dentro tutte le mie attrezzature di lavoro e non.
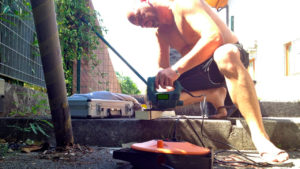
Poi ho dovuto mettere mani al portafoglio ahimè , per comperare della moquette , un telo e della gomma piuma , per farci questo:
la moquette l ho posizionata sopra la base del letto fino al soffitto dove appoggerò la testa per avere un pò di morbido , la gommapiuma con uno spessore di 5 cm ho realizzato un materasso è con il telo ho creato un sacco dove racchiudere il materasso.
Dopo questo lavoro è l ora di pensare al mobile multi funzione che ho recuperato da un’altro allestimento che avevo creato per una panda 4×4 realizzato sempre con materiale di recupero come un pallet e parti di un cassone di legno ..
Il mobile misura circa 1,15x 0,36 x 0,45 mt ed è così composto :
una parte per contenere il serbatoio dell’ acqua da 10 Lt per la doccia
una parte per la piccola cambusa
un ripiano apribile con il fornello a gas per farmi da mangiare
ed una parte per il tavolo creato da un contenitore di plastica dove dentro ci ho messo la batteria del impianto fotovoltaico è tutti gli accessori che mi servono per lavorare.
Alla fine ci ho installato anche una striscia a led per illuminare il tavolo in modo di lavorare alla sera senza usare quelle del Vecio che sono belle forti.
Ho voluto creare un mobile così perché ho la possibilità di spostarlo dove voglio, essendo realizzato per portare tutto dietro come dicevo , la doccia, cambusa, il tavolo, così può essere usato anche fuori dal mezzo ho addirittura in un altro.
Posizionato anche questo e fatto la prova che tutto funzioni per bene sono passato alla creazione di una cassapanca per stare seduto e mettere dentro le cose quali possono essere vestiti, materiali oppure la spesa settimanale, per questa in realtà non ho usato materiale di recupero in quanto ho trovato un bellissimo kit con tutto già pronto per essere costruito presso un centro del fai da te , che dire fantastico ed anche economico, in mezz’ora ho fatto tutto passando anche il collaudo del mio peso, circa 86 kg.
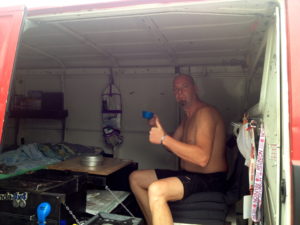
Per finire questo allestimento provvisorio ho dovuto pensare anche alle mie esigenze fisiologiche, avrei potuto usare come nel vecchio allestimento della panda il classico secchio, ma questa volta ho voluto coccolarmi e stare un pò comodo, quindi purtroppo anche stavolta ho dovuto mettere mano al portafoglio di nuovo presso un rivenditore di camper, acquistando un wc chimico.
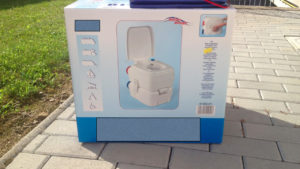
per chi no non li conosce non praticando la vita on te road il suo uso e molto semplice, in fondo è come un wc di casa, disponendo in più di due serbatoi realizzati assieme alla seduta.
Nel primo alla base si riempie con 1 Lt d’acqua circa, ci si aggiunge un prodotto specifico per neutralizzare gli odori ed i residui, poi nel altro serbatoio che si trova nella parte superiore, si riempie solo d’acqua a seconda della capacità che poi servirà da sciacquone, come vedete è molto semplice, ovviamente non si potrà scaricare nei tombini ho dove si vuole, bisognerà appoggiarsi nelle aree attrezzate per i camper oppure presso i centri vendita camper che dispongono di questo servizio.
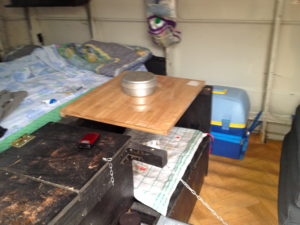
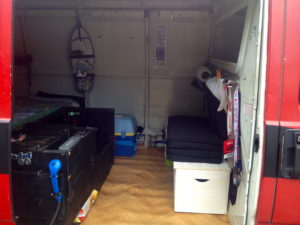
Ecco fatto amici, con questi pochi materiali e pochi soldi ho realizzato il primo allestimento del Vecio , pronto per essere usato per questa estate , poi in autunno passerò a quello definitivo, ho già delle idee in mente per renderlo bello e confortevole sempre nella semplicità è funzionalità.
Bè amici penso di avervi detto tutto, vi saluto a tutti e vi rimando al prossimo post.
Ciao ciao Max & Il Vecio
English version by Google Translator
Hello everyone I’m back with you again, today I will speak of ‘interior of Vecio.
The whole is still started before the ‘arrival of Vecio, as with the’ help of my laptop I realized what was to become the interior.
Because I really like the DIY I wanted to make a temporary installation set up with waste material and recovery, as well the summer I was looking forward to start shooting with Vecio, then doing so, even I will have to make changes in according to my needs next fall, you know draw on a computer with all the measures can be fun and precise but then you have to see if it actually goes like really wanted, so it seemed the sensible thing to do so to create something truly my .
Then came the Vecio I started with removing the garbage and clean everything done with the help of a ‘pressure washer everything, out to out, fortunately we are in summer so it dried in a couple of hours, I had to do this in as the Vecio belonged to a gardener, so you can understand and imagine what condition he was in.
Well now let’s start with the ‘true construction it is: First, I started with throw down a rubber mat with drawn on a wooden floor, recovered from a friend who was renovating his apartment, a nice savings, after this operation I recovered two wooden shelves abandoned in the garage for some years the measure of 1.22 x 0.80 meters each, after they have been painted, I have created the basis of what will be the bed, placing them in the back of Vecio in the direction of the width , using two pieces of wood I used them as walking together with part of the frame to keep raising the whole of about 45 cm, thereby creating a lower locker to put in all my work equipment and not.
Then I had to put hands to the portfolio alas, to buy the carpet, a cloth and foam, to make us this:
the carpet I positioned above the base of the bed to the ceiling where it will support your head to get some soft, foam rubber with a thickness of 5 cm I made a mattress is with the fabric I created a lot where enclose the mattress.
After this work is the time to think that I have the mobile multi function recovered by another setting that I had created for a 4×4 panda always made with recycled material such as a pallet and parts of a wooden box ..
The cabinet measures approximately 1.15x 0.36 x 0.45 meters and is as follows:
a part for containing the dell ‘water tank 10 Lt for the shower
a part for the small galley
a sliding shelf with the gas stove to get me to eat
and a part for the table created by a plastic container inside where it took the photovoltaic battery is all the accessories that I need to work.
Eventually I also installed there a LED strip to illuminate the table in order to work in the evening without using those of Vecio that are beautiful strong.
I wanted to create a mobile so that I can move it where I want, being made to bring all behind as I said, the shower, galley, the table, so it can also be used out of the half I even another.
Also positioned that and did the test that everything works for good are passed to the creation of a chest to sit and put into things which can be clothes, materials or the weekly shopping, for this I actually did not use recycled materials as I found a beautiful kit with everything ready to be constructed at a center of DIY, which means fantastic and economical, in half an hour I did all through even the testing of my weight, about 86 kg.
To finish this temporary installation set up I had to think about my physiological needs, I could use as in the old layout of the panda classic bucket, but this time I wanted to cuddle and stay a little comfortable, so unfortunately I had to once again your wallet to again at an RV dealer, buying a chemical toilet.
for those who do not do not know them not practicing on life te road its use is very simple, basically it is like a toilet at home, placing more than two reservoirs created together with the seat.
In the first to the base is filled with about 1 liter of water, there is added a specific product to neutralize odors and debris, then in another tank that is located in the upper part, it only fills of water depending on the capacity that then serve as a toilet, as you see it is very simple, of course you can not download in the drain where I want to, have to lean in areas equipped for campers or motorhomes at retail centers that offer this service.
That’s it friends, with these few materials and little money I made the first staging of Vecio, ready for use this summer, then autumn will pass to the final, I already have ideas in mind to make it beautiful and comfortable it is always in simplicity functionality.
Well friends I think I have said everything, I greet you all and I refer you to the next post.
Hello hello Max & The Vecio


Hi to all, how is everything, I thin every onee
is getting mire from this web page, andd your views aare pleasant designed for new viewers.
thank you greetings Max